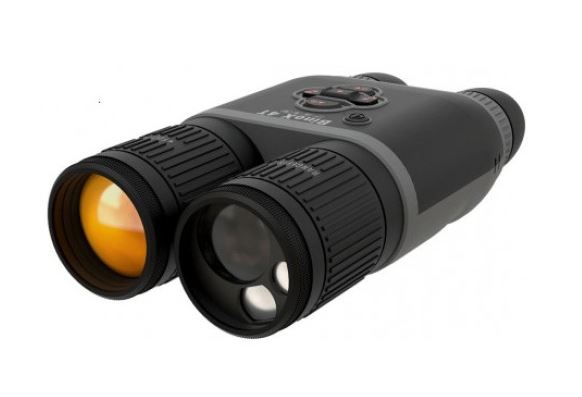
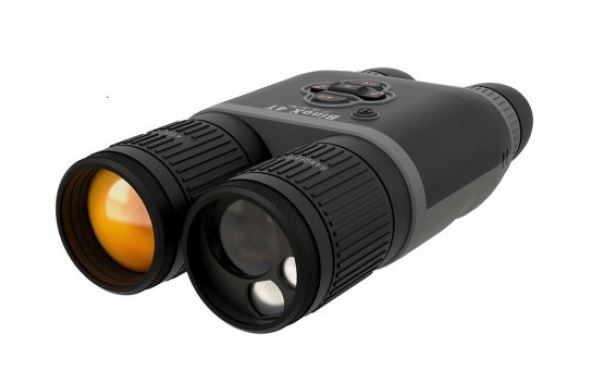
Products:
Operation
Powering on and image setup
• Open the lens cover (1).
• Press the ON/OFF button (2) briefly to power the device on.
• Adjust the sharp resolution of the symbols on the display by rotating the dioptre adjustment ring of the eyepiece (3).
• Rotate the lens focus ring (4) to focus on the visual target.
• Enter the main menu with a long press of the Menu button and select the desired calibration mode: manual (M), semi-automatic (SA) or automatic (A).
• Press the ON/OFF button (2) briefly (when the calibration mode is SA or M) to calibrate the image. Close the lens cover for manual calibration.
• Select the desired operating mode (Forest / Rocks / Identification / User mode) by briefly pressing the UP button. User mode allows to change and save user brightness and contrast settings.
• Select the appropriate color palette by long pressing the UP button.
• Adjust the brightness, display contrast, smooth digital zoom (see the “Quick menu functions” section of the full version of the manual.).
• To change the lens, slide the lens lock toward the power button, rotate the lens toward the power supply, and carefully remove the lens. Install the new lens by sliding the lock back, rotate the lens toward the control buttons until it clicks. Configure the image as described above. To display the magnified image properly, configure the lens type in the basic settings of the device (Lens selection menu item).
• Upon completion of operation turn the device off by long pressing the ON/ OFF button (2).
Components and Controls
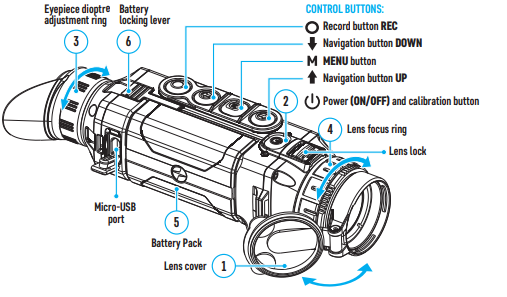
Buttons Operation

Battery pack charging
• Lift up the lever (7) of the charger.
• Install the Battery Pack (5) into the charger as far as it can go.
• Lower the lever (7).
• Connect the micro USB plug of the USB cable (8) to the micro USB port (9) of the charger.
• Connect the other end of the microUSB cable to the mains adapter (10).
• Plug the mains adapter (10) into a 100 – 240 V socket (11).
• Disconnect the charger from the mains after the battery is fully charged (green LED light stays on continuously).
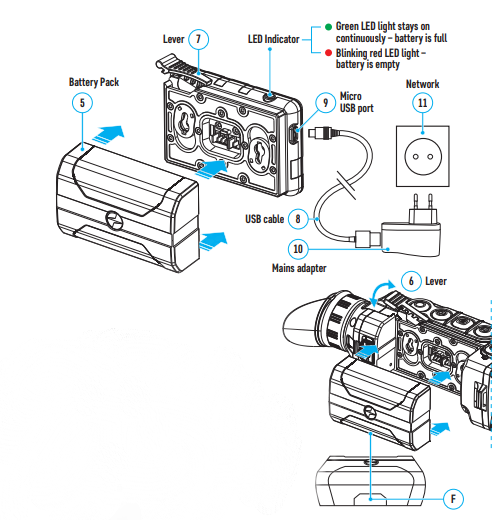
Installing Battery Pack
• Lift up the lever (7). Remove the battery (5) from the charging pad.
• Lift up the battery locking the lever (6).
• Insert the battery (5) as far as it will go into the slot of the device body designed for it so that the F part is at the bottom.
• Lock the battery by lowering the lever (6).
Stream Vision App
Download the Stream Vision app to stream the image via Wi-Fi from the display of your device to a smartphone or tablet. Detailed instructions are available on the Internet at: www.pulsar-vision.com
Specifications
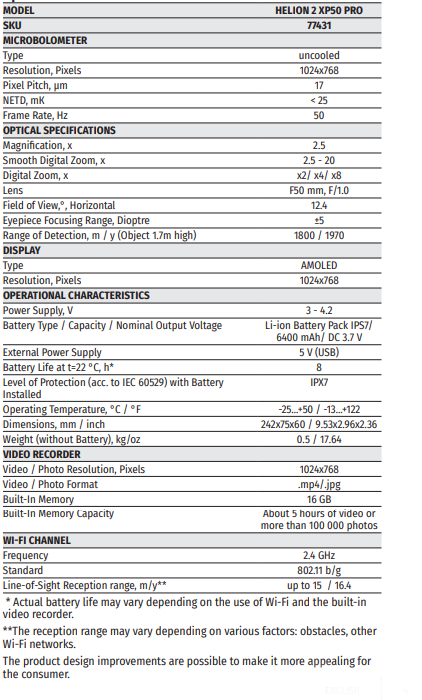
Package Contents
• Helion 2 thermal imager
• IPS7 Battery Pack
• Battery Pack charger with mains adapter
• USB cable
• Carrying case
• Hand strap
• Quick start guide
• Lens-cleaning cloth
• Warranty sheet
