
In December 2024, the Austrian company Swarovski introduced a new application called Swarovski Hunting App, which combines the Swarovski Ballistic Program and the EL Range Configurator. The purpose of this article is to describe the ease of use of this new application and the advantages it brings. Similar applications are also offered by other companies.
Among the main objectives were:
- ease of installing the application;
- connecting the smart device with the binoculars;
- ease of entering the necessary data;
- usability of the results (ballistic calculations and map tracking),
The usability was primarily tested from a hunter’s perspective, as I used the EL Range binoculars almost every day for all types of hunting from September to February: for stalking, from a hunting stand, in the mountains, for long-distance shooting practice with a hunting rifle, and even during daily walks in nature. Although I used the application and the binoculars almost daily, this report will be shorter than it deserves, as I cannot describe every single hunting/shooting situation I encountered. I can say that installation and use of the application were simple, and the obtained data very useful. However, I did encounter some difficulties with the Tracking Assistant function, which required the most time for testing.
But let’s go back to the beginning, to September, when the company Optics Trade d.o.o. from Slovenska Bistrica lent me the Swarovski EL Range / Tracking Assistant 10×42 WB binoculars for testing. Back in August, there were still two separate applications that already allowed users to fully take advantage of all the features offered by the EL Range binoculars.
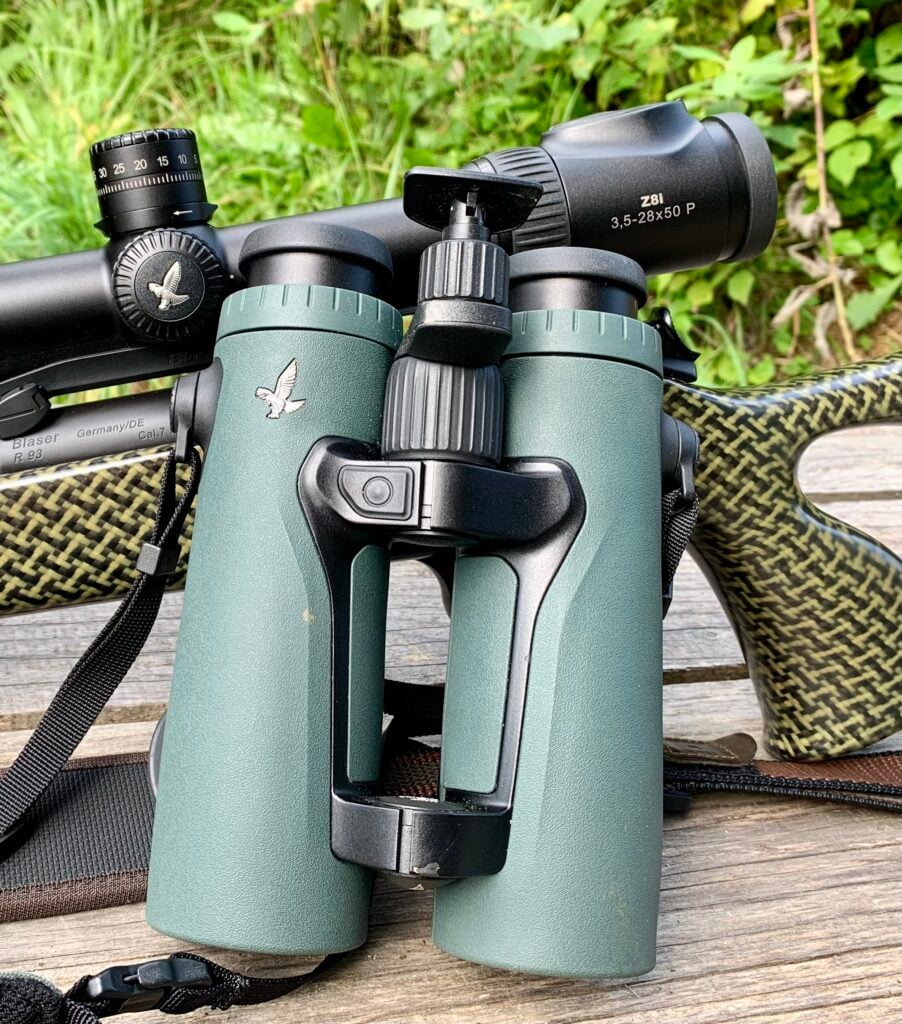
If at that time the EL Range Configurator application was more intended for use with the EL Range binoculars, hunters/shooters who did not yet own these binoculars could already rely on the freely available Swarovski Ballistic Program application to find ballistic solutions. After entering all the required data, this application provided a ballistic solution.
Using the Swarovski EL Range
When I first received the binoculars, I tested which features I could find and use without carefully reading the instructions beforehand. Very quickly and intuitively, I found the button for measuring distance and, soon after, the MENU button. I could measure distance, and by using the MENU button I could enter it, move through it, make selections, and adjust certain settings. It is somewhat easier to change settings in the application on a smart device than directly on the binoculars.
Then I watched a video on YouTube on the channel “SWAROVSKI Optik Hunting” (SWAROVSKI OPTIK EL Range with Tracking Assistant Comprehensive Tutorial). The video is a simple, clear, and easy-to-understand presentation of the binoculars’ settings and features (and the older application) without unnecessary extras. There are several such videos, but this one is probably the simplest and clearest. Only afterward did I pick up the manual. It takes about 20–30 minutes to read through the instructions and actually check all these functions (MENU, navigation in MENU, selecting in MENU, compass calibration) either in the application or directly in the binoculars. With practice, we can then verify the results based on the entered data.
Overview of the Main Features of the EL Range TA Binoculars
The EL Range binoculars combine binoculars (telescope) with a rangefinder and can provide ballistic data for an accurate shot. This means the binoculars merge modern optics with precise measuring and calculation functions.
Once we transfer our own ballistic data about the bullet into the EL Range, it is possible to set it so that, in addition to the distance, the necessary corrections are also displayed. This allows for truly accurate assessment and response to any hunting or shooting situation, enabling precise shots even at longer distances.
The built-in tilt indicator, together with the angled shot program, can display either the adjusted shooting distance or the shooting angle itself. With the Swarovski Hunting App, we configure the EL Range binoculars to provide corrections/data according to our ballistic information. Based on the measured ballistic data (angle, distance) and detected atmospheric data (air pressure, temperature), the EL Range enables highly accurate targeting. Along with the calculated adjusted shooting distance, depending on the input data and measured distance, it can also provide the necessary corrections (e.g., “clicks”) for our riflescope.
The Tracking Assistant helps to mark—or more precisely, narrow down—the area where the last shot hit the target or the exact point where the measurement was taken. The application guides you to this measurement point using data—arrows on the smartphone map or arrows visible directly in the binoculars.
Installing the Swarovski Hunting App
Anyone with at least basic knowledge of their smartphone or other smart device will need about three minutes to open the app store (in my case App Store/iPhone), search for the application, and install it.

As mentioned, during the testing period in December 2024, the Swarovski Ballistic Program application was merged with the EL Range Configurator application and renamed to Swarovski Hunting App, combining the features of both. Prior to this (before December), the Hunting App had already notified me that a change was coming, and on the day of the merger, I was informed. The settings and data about the riflescope and bullet characteristics were confirmed with just one click in the Swarovski Ballistic Program and transferred into the now new Hunting App.
The Hunting App allows hunters to input, connect, and manage data from a single device. With the app, you can quickly and easily switch between different devices such as binoculars, riflescopes (you can have more than two), and make use of functions like map view and ballistics.
The app allows:
- customization of the binoculars and/or riflescope to our needs,
- management of your personal ballistic data,
- a clear map view,
- tracking your movements in the field with a log, and
- sharing information with others.
Connecting the Smartphone with the Binoculars and Settings
Connecting
Activate the Bluetooth on your smartphone. Then activate Bluetooth on the EL Range binoculars by pressing and holding the MENU button and the measurement button simultaneously for 3 seconds, so that a blue LED light/indicator appears next to the MENU button (function button) and remains on.

On first use, connect the app on your phone with your EL Range binoculars by entering the serial number of the binoculars, which can be found under the right eyepiece. Your smart device and binoculars are now connected.
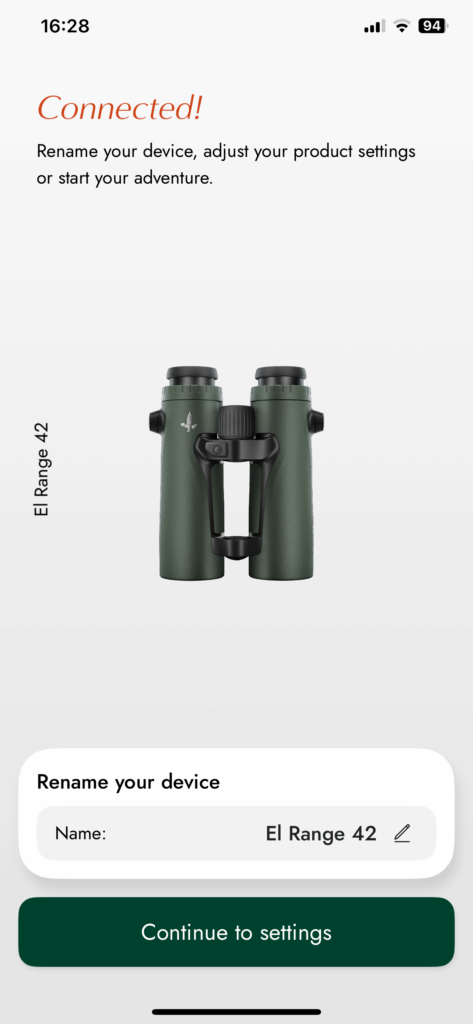
Settings – selecting the riflescope and settings in the EL Range
When in the “riflescope” section of the app, select from the list which Swarovski riflescope you are using, and then proceed to the “EL Range” section, which relates to the binoculars.

You can set or choose units, levels, and profiles:
- 5 brightness levels of the display
- atmospheric data – in °C or °F
- distance – in meters or yards
- rifle profile – you can choose between multiple profiles, different ammunition, and firearms.
Each profile can be customized to match your ballistic data for specific ammunition or a specific firearm.
The settings can be transferred from the binoculars to the app and from the app back to the binoculars, although it is somewhat easier to make all changes and adjustments in the app on a smart device.

To turn off Bluetooth, press and hold the MENU button for two seconds.
Entering Data into the App
The required data concern the projectile, the zeroing distance, and the environment:
Projectile data:
- bullet weight (grams, grains),
- muzzle velocity (V0 in m/s),
- ballistic coefficient (BC) G1 or G7.
Whether you use factory ammunition or handloaded rounds, the bullet weight and its velocity and BC are recorded or measured. When creating a new profile in the app, you can choose from a large selection of factory ammunition: first select the manufacturer, then the nominal caliber, then the cartridge with a specific bullet and its characteristics such as BC and velocity.

Of course, the recorded velocity for a given firearm may not be the actual velocity that ammunition achieves in your gun. Here those of us who have a chronograph have an advantage. Knowing the exact projectile velocity — which is not necessarily the same as the velocity printed on the ammunition box — will always yield more accurate results.
With the Swarovski Hunting App you can also calculate the BC yourself by measuring the bullet velocity at two distances. Compare the muzzle velocity (V0) with the bullet velocity measured at a known distance (100 m, 200 m, 300 m…), enter the obtained data, and the program will calculate the BC taking the provided environmental data into account.


Zeroing data:
- optical axis above the bore axis in cm,
- zeroing distance
We need to know how far the optical axis is located above the bore axis. The easiest way to do this is with a rigid cleaning rod inserted from the muzzle. While looking through the eyepiece, measure the distance between the center of the rod and the center of the eyepiece.
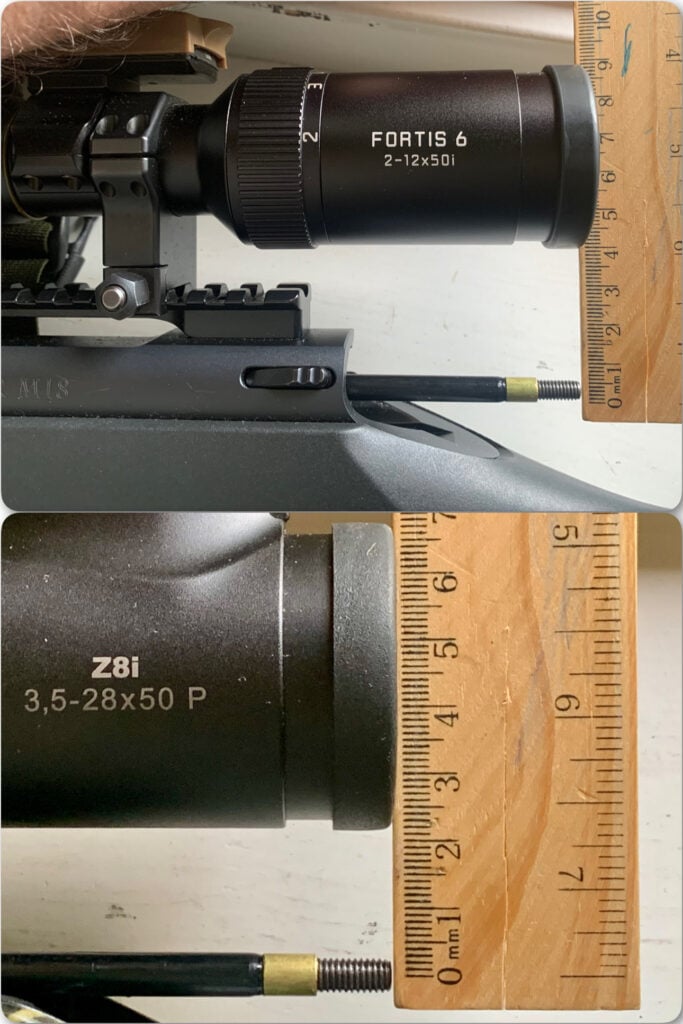
Zeroing distance is the distance at which the bullet hits the target in the center. When using a ballistic turret, this distance should be 100 m.
Environmental data:
- temperature,
- humidity,
- air pressure, and
- altitude.

Environmental data include temperature, humidity, air pressure, and altitude. All of these affect air density and thus how much resistance the bullet encounters. Warmer air, higher altitude (associated with lower air pressure), and higher humidity reduce air density (the molar mass of water vapor is lower than the molar mass of dry air), which means the projectile drops less and impacts higher.
Environmental data such as temperature, humidity, and air pressure can be captured with a smart device by selecting the function “Get current weather data.” On the same page, you can also enter information about wind, wind angle, and the shooting angle itself. Naturally, the shooting angle must be entered manually unless you have a rangefinder that can measure it automatically.

After entering all required data (in the “riflescope” section of the app), go to the app’s “EL Range” section (the binoculars) and choose which data (in addition to distance) you want to see in the second line when you take a measurement and look through the binoculars’ eyepiece. You can choose from data such as: bullet drop in cm, in inches, clicks, MOA (minutes of angle), MRAD/MIL, shooting angle/incline (in degrees), compass heading (in degrees), and the corrected or adjusted shooting distance (displayed as CAL).

As mentioned, this is easier to do in the app itself. If you perform the adjustments on the binoculars, press and hold the MENU button for 2 seconds. Use the MENU button in MODE to move between options, and use the measurement button to enter and change them. The available options are:
- TRACK (Tracking Assistant)
- COMP (compass calibration)
- PLUS (selection of the value that will be displayed on the second line)
- LIGHT – illumination level
- ATMOS DATA – in °C or °F
- UNITS – metric (meters) or imperial (yards)
- RIFLE (select the ballistic profile, if you have multiple)
- MENU EXIT – exit the MENU
When you select an option, confirm it by pressing the distance measurement button.
Usefulness of the Obtained Ballistic Data
External ballistics
As mentioned, you can choose for the correction to be displayed in the binoculars in units such as: cm, inches, clicks, MOA (minutes of angle), or MRAD/MIL. The shooter can apply this correction on the riflescope using the ballistic turret. Alternatively, the data shows how much the bullet drops at that distance, and the shooter can then adjust using the aiming reticle.

The obtained data proved to be very useful during hunting, as last year I acted as a guide on a chamois hunt for two hunting guests from abroad on a multi-day hunt and for a hunting friend on a one-day hunt. At the same time, my colleagues and hunting families also guided the hunting guests; almost all the guests had rifles fitted with appropriate scopes and ballistic turrets. Long distances and shooting angles up to 35° required correct assessment of distance, the shooting angle, and precise information about the required correction. All of the guests I mentioned who had ballistic turrets were successful in their shots, even though they did not always have a high maximum magnification. My first guest from abroad was not so lucky, however, because the distances were simply too great for an ethical shot with his 3–12x riflescope without a ballistic turret, although we also calculated how much correction (measuring higher in cm) would have been needed in the given conditions.


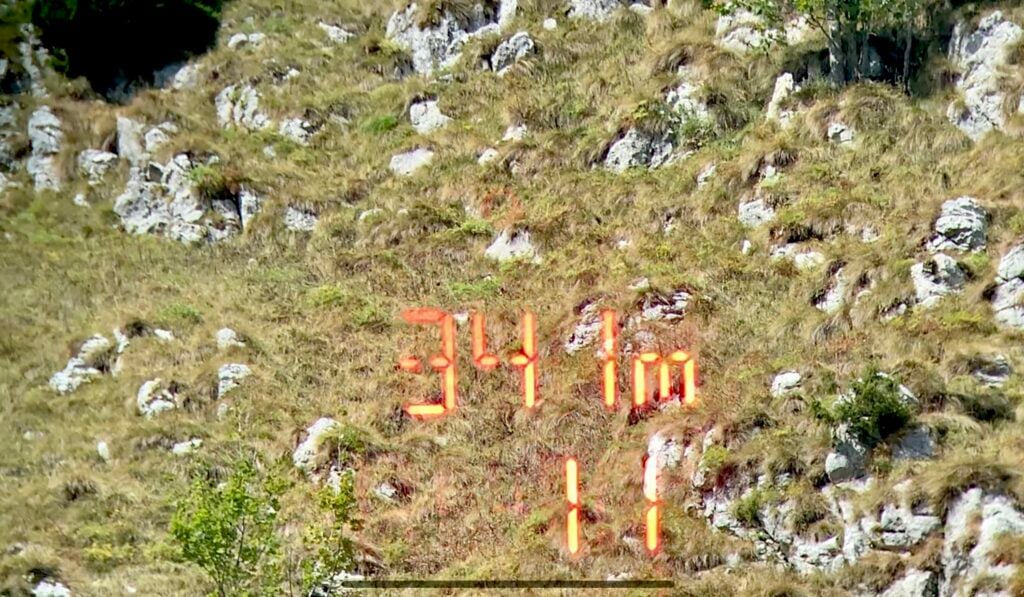

Throughout all the days of the mentioned mountain hunt I carried the EL Range on me; carrying it proved comfortable, the carrying case excellent, and the binoculars impressed with their optical qualities and—above all—with the immediate provision of distance and correction information. I did a lot of hunting and observing roe deer in fields, where distances are also large. On flat ground it is even harder to judge distance correctly; on the plain we usually underestimate it, while in the mountains we overestimate it—by about 15–20%, even if we are skilled at range estimation. During hunting I also used shooting sticks and with them I bagged two roe deer. In the hunting area I also (from shooting sticks) safely fired five shots at 510 m in winter from one ridge to another; the EL Range told me the required correction was 30 “clicks.” Let me just say that I did not doubt the EL Range—rather I doubted myself, because I was breathless and the wind was rocking me on the ridge. Three shots were actually fired while swaying, but I also took two perfectly steady shots and the result was very good. Of course it was only a test, as I had not previously shot this reticle at such a distance.
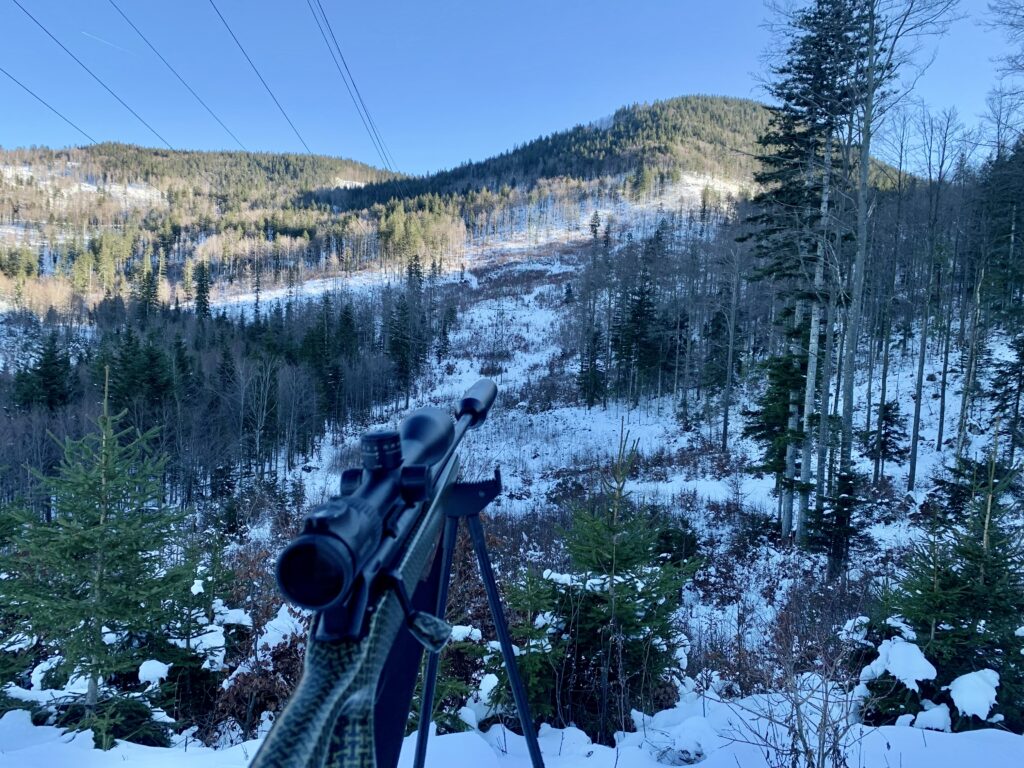

Tracking Assistant
The condition for the app to function is that the smartphone (or tablet) is connected to the mobile network, since only in this way, via data transfer, do the maps work. When measuring, your position and the measurement point are marked. You can then navigate to this point using the TRACK function (Tracking Assistant).
If these measurement data are transferred from the binoculars to the smartphone via Bluetooth, both your position and the measured point appear on the map. With the help of the map, you can then move toward this point. The company itself warns that this is only a tracking aid, meaning it will not, for example, lead you to the exact measurement point (such as after a shot at game), but only close to it.
Compass calibration is required to ensure both the accuracy of the compass itself and the accuracy of the map tracking application (Tracking Assistant). It is carried out using the measurement button once you are in the COMP submenu. A green LED light on the back blinks while calibration is in progress and turns off once calibration is completed.

Calibration is recommended when you are in new terrain and during significant temperature fluctuations. During calibration, move about 40 cm away from metal objects such as a car or a gun barrel, as well as from magnets.
Using the Tracking Assistant:
- measure the distance to the target/point,
- activate Bluetooth on the EL Range device (and on the smart device),
- transfer the measurements from the EL Range device to the smart device.
- each individual measurement has its own number (e.g., #3, #6..) and includes data about the time of measurement, the measured distance, and its direction
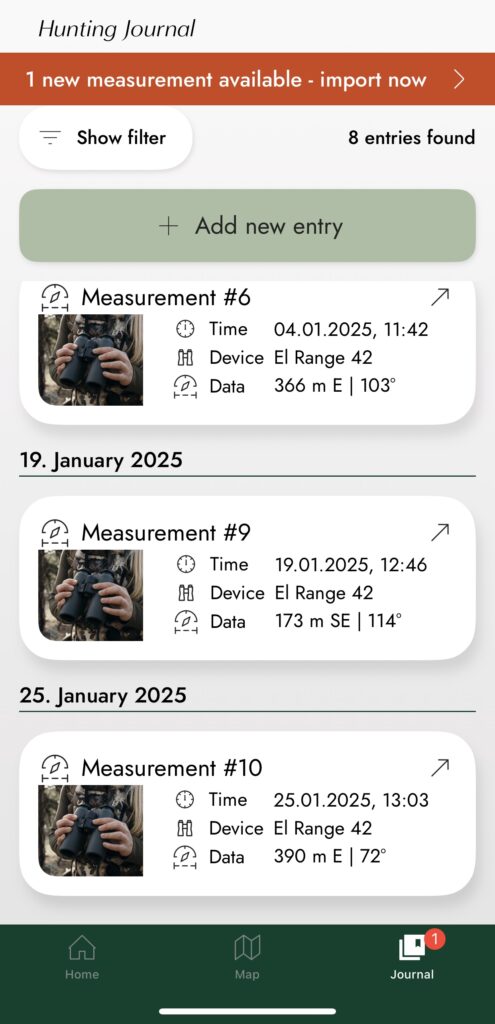
- by entering an individual measurement we open the map, where we can first set the location automatically or manually,

- on the map you can see the location from where the measurement was taken, the point hit by the laser beam, and the offered navigation option.

- navigation on the map guides or directs us in the right direction via an arrow. Since our current location is always visible on the map, we can observe where we are and whether we are moving in the correct direction.

Practical Experiences with the Tracking Assistant
While the use of the EL Range was a true optical and data-driven pleasure during hunting and long-distance shooting, the use of the tracking function was not as successful as I expected. During measurement, the binoculars clearly defined the point I had targeted, but on the map it marked a different location, sometimes up to 200 m further to the right, depending on the distance. I added a star to additionally mark the spot where I had actually measured.


Without pause, I placed myself in imagined hunting situations, where I first measured the distance to the game, “took a shot at the game,” and then tried to locate that point in the field using the map. I did this with the binoculars, whose compass had been properly calibrated beforehand, at different distances, in the lowland part of the hunting area (500 m a.s.l.), in the mountainous and hilly parts of the hunting area (up to 1600 m a.s.l.), where I had cell signal and an internet connection. I tested both navigation by looking through the binoculars and by transferring the data to the smartphone. Every time the “hit” of the laser beam was incorrectly recorded on the map, it also navigated me incorrectly. While the navigation function through the binoculars always worked—though inaccurately—the arrow on the smartphone map only worked correctly in two cases. In the first, when the hit was marked incorrectly, it led me correctly to that “wrong place.” Only once, when everything worked as it should, did it guide me within 11 meters of the clearly selected point, the wall of a building, during a 200 m measurement.
Why tracking was mostly unsuccessful, I do not know. When using the map in the app, it always located my current position immediately and very precisely, but it rarely or almost never marked the measurement point correctly. This is exactly where I spent the most time and patience, and in the end I concluded that this function is not very useful, since even if it works, it does not guide you to the exact point you marked.
If it works, I see this tool as useful when shooting in flat areas covered with tall grass or crops, where there are no visible reference points to use for orientation when moving toward the shot point. It is probably also handy when shooting game with a gully or canyon between you and the target that must be crossed. I recommend hunters not rely on this application, but rather memorize distinctive natural landmarks as we hunters already do.
For real-time tracking, a constant Bluetooth connection between the devices is required. During this time, distance measurements and correction display are not possible. It is also a drawback that one must rely on calibration, which has to be performed if you wish to trust the data. If this is done immediately after a shot, it will certainly not be convenient.
Hunter Luka Krnc, who has been using the EL Range for two years, also finds that the accuracy of the Tracking Assistant is generally quite poor. In flat terrain (around his home), where he had very good signal, the EL Range and the app were accurate in 7 out of 15 cases. When accurate, it was within a few meters (between 6–12 m). He measured telegraph poles, trees, and objects. In the failed cases, the EL Range led in the approximate direction but was quite far off—more than 50 m and in one case even 200 m.
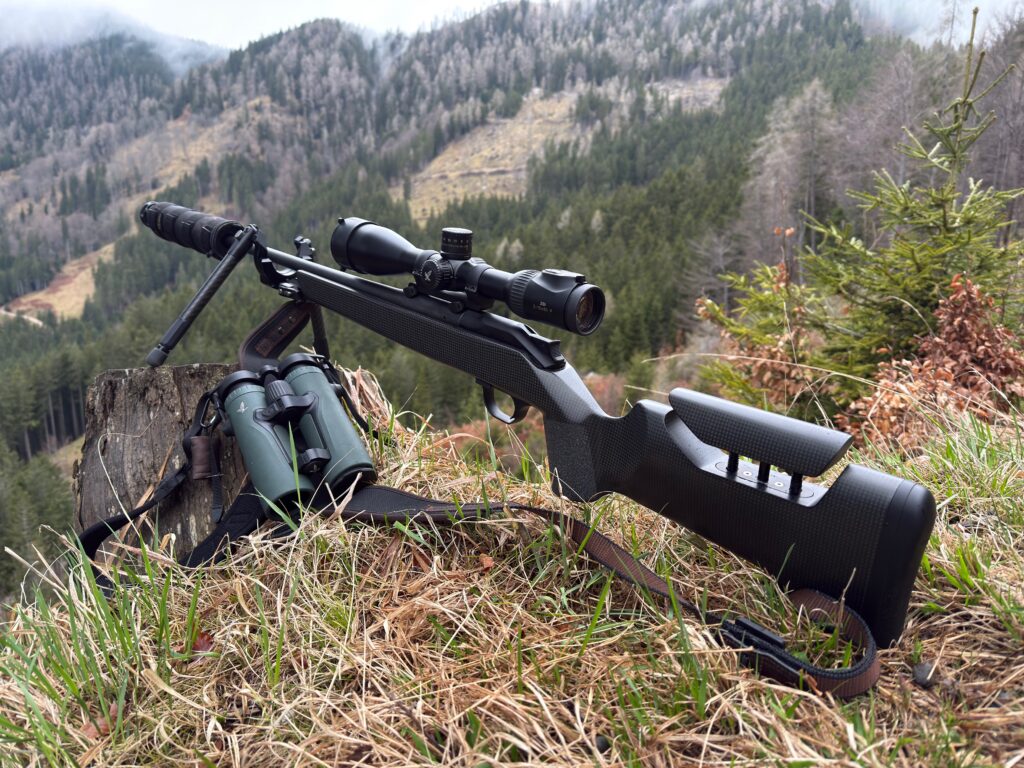
In the hunting grounds where the signal was weak, Luka found that the accuracy was even lower. The success rate was 4 out of 15 cases, and as in flat terrain, the accuracy was between 6–12 m. In most of the failed cases, the direction was somewhat correct, but the distance was simply too great. For one target, however, the direction was completely wrong, and Luka assumes the cause was the very poor signal. For both cases, he used the app on his phone.
Where there was no signal in the hunting area, he tried his luck using only the Tracking Assistant on the binoculars themselves. His impression was that navigation was somewhat better, but it takes some getting used to operating and navigating via the binoculars. Out of 10 measured points, the EL Range guided him within a few meters of the marked target 5 times. He chose clearly visible trees, stumps, and rocks as reference points. For the other 5, navigation was in the wrong direction or quite far off (more than 40–60 m) from the marked target.
Other Equipment for the EL Range
Along with the binoculars, the set also included: a case, a carrying strap for wearing around the neck (UCS-R universal comfort strap with battery compartment), an eyepiece cover, permanently attached objective lens caps, and a cleaning kit. Optics Trade also provided a chest carrying harness and a forehead rest.


Forehead rest: while some users are outright enthusiastic about the option to stabilize the binoculars against the forehead while holding and observing with them, I as a hunter did not find this accessory (on the 10×42 binoculars) particularly useful. Yes, it certainly stabilizes the support and viewing, but not to such an extent that I would want to keep the accessory mounted. It can also be annoying if it is not mounted correctly. Because I used the binoculars both for hunting on flat ground, for stand hunting (looking downward), and for mountain hunting (mostly looking upward), the position of the rest had to be adjusted each time. I believe it may be useful to someone who does very long observation sessions at higher magnification, or perhaps to someone with shaky hands. For the way I hunt and use the binoculars, it did not add any particular benefit. Most of my hunting friends who tried the binoculars with the forehead rest agreed. After a month of use I removed the accessory and did not miss it.
Chest carrying harness: if the forehead rest didn’t quite convince me, the carrying harness for the binoculars absolutely delighted me. The binoculars, a valuable measuring and optical instrument, are kept constantly protected in the harness not only from impacts but also from rain, snow, and similar grime. With the harness on the chest we can easily lie down and observe with the binoculars while prone. Because the top closure of the harness replaces the eyepiece cover, the binoculars were always immediately ready for observation. When I used the binoculars without the harness, I first had to remove the eyepiece cover and set the interpupillary distance to fit my eyes. What was most annoying was that I had to refocus each time, since the focus setting always shifted away from the “sweet spot.” But when the binoculars were in this harness, all settings were “locked”; I only had to raise the binoculars to my eyes and make minimal distance-based corrections if needed. In addition, carrying the harness with the binoculars on the chest was very comfortable, especially for all-day use. The weight shifted and distributed to the shoulders and did not strain the neck as happens with a classic neck carry. Mounting and removing the harness was very easy and reliable. With a simple pull of the cords the straps released and you can literally “slip off” the harness when changing clothes or after the hunt.
Hunting in the mountains
Mountain hunting requires appropriate physical fitness, equipment, and the ability to shoot at longer ranges. Hunting and bringing down game are associated with physical effort. Mountain hunters place great emphasis on suitable equipment. Weight is important. Hunters who hunt a lot in mountain terrain know exactly what they need and do not use heavy, cumbersome, or superfluous equipment. They certainly do not want to use unreliable gear. If the EL Range can easily replace two devices — a rangefinder and binoculars — a quality, high-magnification riflescope can sometimes replace a spotting scope.
Distance to the quarry is also important. A long-range shot is ethically acceptable if the shooter is well trained for it. Equipment alone is not enough; knowledge of bullet trajectory (drop) and all influencing factors is also required. Proficiency is essential, and it is gained only through practice, not by relying on an open hunting catalog with ballistic tables. You must go to the range and practice. By checking the reticle, ammunition, and yourself you gain confidence. Quality equipment that reliably provides this information can, without doubt, give precise data so that already during training — and later in the hunt — we maintain the necessary confidence, conviction, and certainty for every shot we take.
Z8i 3.5-28×50 P riflescope I have been using on an R93 action in 7×64 since 2022, when I upgraded the rifle with a new Carbonomix carbon stock and a new riflescope, turning it into a light (3.5 kg) and excellent mountain-hunting rifle — and of course suitable for longer shots. At 665 grams the riflescope is light and an excellent companion on a mountain-hunting rifle and ideal for hunting situations where identifying details at greater distances is necessary. The wide magnification range gives this model exceptional versatility. Thanks to the maximum 28x magnification it enables precision for observation and shooting at longer distances. The Z8i stands out for its aesthetics, traditional hunting look, and superior finishing, combined with 93% light transmission, which is not typical for similar “super-zoom” models. The Z8i series was upgraded in February 2025 with the Z8i+ 5-40×56 P. For long-range shooting you need precise equipment that measures the distance to the target, provides the necessary data, and even immediately offers a ballistic solution.
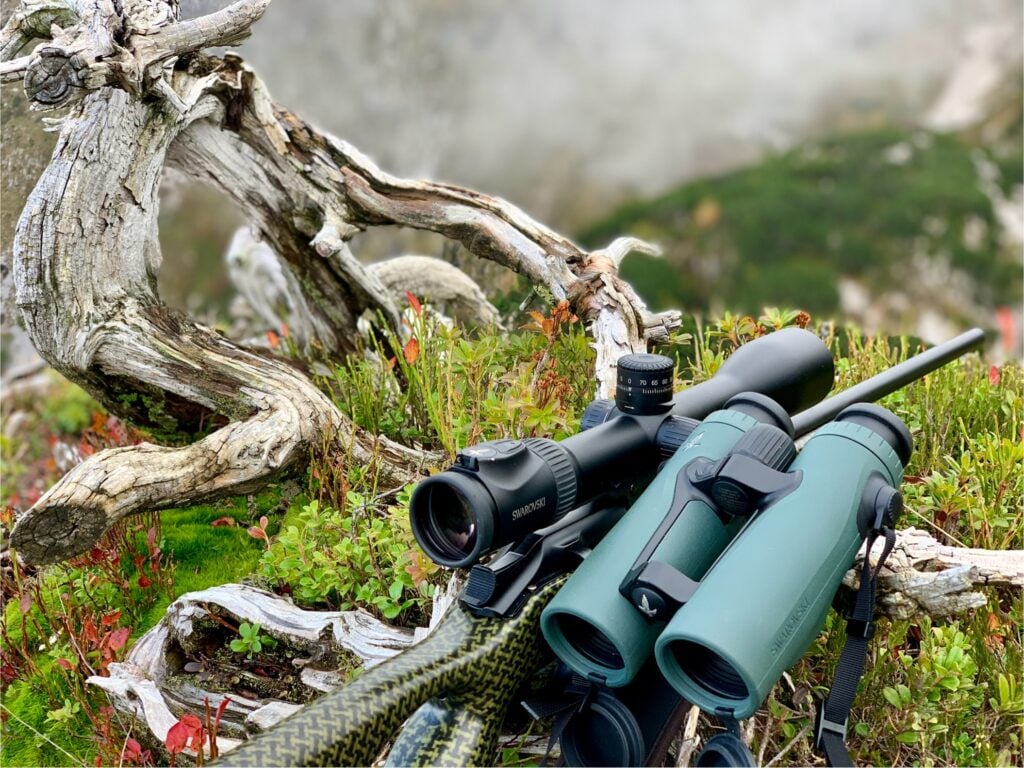


The Z8i riflescope series is compatible with the BTF ballistic turret (“ballistic turret flex”), which can be purchased separately for any Z8. The acronym BTF can be translated as “ballistic turret flex.” Although its internal parts are plastic, the BTF has proven to be durable, practical, precise, and not overly protruding. The user can easily remove the BTF ballistic turret and screw on a standard protective cap. The rifle is zeroed at 100 m, and then the ballistic turret is used to compensate for bullet drop with “clicks.” Each movement of the turret (click) shifts the point of impact by one centimeter at 100 m. The turret allows clear reading of the markings and also provides a “0” return position, even in poor visibility, as it has a so-called “zero stop.” The settings can be locked with an additional ring at the base of the turret, making any unintentional movement impossible.
You can also mount six rings onto the turret; four of them have numbers, “2,” “3,” “4,” “5,” and two have dots for intermediate distances (e.g., 350 m, 450 m). The markings are set according to the reticle adjustments (“clicks”), as suggested by the ballistic table generated by the app based on the entered bullet data. Alternatively, the basic turret can be used directly, as the maximum vertical reticle adjustment is 14 mrad or 70 clicks. With the 9.7 g ELD-X bullet (860 m/s), this corresponds to a maximum distance of 800 m, while with the 9.1 g TTSX bullet (885 m/s) the maximum distance is 750 m. The Z8 3.5–28×50 can also be upgraded with a custom ballistic ring engraved with your individual ballistic curve, produced by Swarovski.
For long-range shots with this riflescope, since 2022 I have relied heavily on the clear program for external ballistics calculation — the Swarovski Ballistic Program, now integrated into the Swarovski Hunting App, the subject of this article.
Devices and programs used (August 2024 – November 2024):
Binoculars: Swarovski EL Range with Tracking Assistant 10×42 WB
- App: EL Range Configurator
Riflescope: Swarovski Z8i 3.5-28×50 P with ballistic turret (BT – ballistic turret)
- App: Swarovski Ballistic Program
Since December 2024, the two applications have been merged into the Swarovski Hunting App.
Conclusion
The EL Range is a superb and very useful optical product. In terms of build quality and optical performance, there is nothing to add — they are excellent. In the mountains, I easily measured a distance of 1800 m handheld, without support, and the rangefinder’s performance was flawless. The price reflects this quality. But for this price, you are not just paying for a name or brand, but for real quality and reliable support in case of problems. Those who use optical devices more seriously know that it is better for the wallet to hurt only once. A high-quality product brings joy for decades, which is far better than buying and replacing equipment two or three times and being dissatisfied all that time. Everything depends on how much time you spend hunting, what you want and need, how important good equipment is to you, and how much you value the data that the device measures (distance, atmospheric data, angle) and delivers instantly along with the necessary correction. For those of us who spend a lot of time in the hunting grounds, such equipment is essential.
The Hunting App is clear and user-friendly, allows saving multiple measurements, and provides access and navigation to the points later. In addition, it offers ballistic data even without taking a measurement. Without a doubt, the combination of the EL Range binoculars and the app is an indispensable tool for hunters and a good decision if you use a Swarovski riflescope — and almost a necessity if you have a ballistic turret and plan to shoot at longer distances. The investment in the EL Range is definitely worthwhile, as it pays off sooner or later in satisfaction, image quality, and the essential “data” that the device provides instantly when making a shot decision.
Gregor Hodnik