

1 Specifications
| Model | MATE LITE L38 | MATE H38R | MATE H50R | MATE ULTRA S60R |
| Detector Specifications | ||||
| Type | Vox | Vox | Vox | Vox |
| Resolution, Pixels | 384×288 | 640×512 | 640×512 | 1280×1024 |
| Pixel Size, um | 12μm | 12μm | 12μm | 12μm |
| NETD, mK | ≤ 15 | ≤ 15 | ≤ 15 | ≤ 15 |
| Frame Rate, Hz | 60 | 60 | 60 | 60 |
| Optical Specifications | ||||
| Objective Lens, mm | 38/F1.0 | 38/F1.0 | 50/F1.0 | 60/F1.0 |
| Field of View (H×V), o | 6.9×5.2 | 11.6×8.7 | 8.6×6.6 | 14.7×11.7 |
| Linear Field of View (H×V), m @ 100m | 12.3×9.2 | 20.5×15.4 | 15×11.5 | 25.6×20.5 |
| Eye Relief, mm | 20 | 20 | 20 | 20 |
| Exit Pupil Diameter, mm | 35 | 35 | 35 | 35 |
| Detection Range, m(Target Size: 1.7m×0.5m, (n)=99%) | 1950 | 1950 | 2600 | 3100 |
| Display Specifications | ||||
| Type | AMOLED | AMOLED | AMOLED | AMOLED |
| Resolution | 1920×1080 | 1920×1080 | 1920×1080 | 1920×1200 |
| Battery Power Supply | ||||
| Battery | Replaceable 18650 battery | Replaceable 18650 battery | Replaceable 18650 battery | |
| Max. Operating Time (22oC), h* | 6 | 4 | 4 | 4 |
| External Power Supply | 5V (Type C) | 5V (Type C) | 5V (Type C) | 5V (Type C) |
| Physical Specifications | ||||
| Wi-Fi / APP | Support | Support | Support | Support |
| Photo / Video Recorder | Support | Support | Support | Support |
| RAV | Support | Support | Support | Support |
| Gallery | Support | Support | Support | Support |
| N-link | Support | Support | Support | Support |
| Remote | Support | Support | Support | Support |
| MAGIC ZOOM | NA | Support | Support | Support |
| Memory Capacity | 64GB | 64GB | 64GB | 64GB |
| IP Rating | IP67 | IP67 | IP67 | IP67 |
| Operating Temperature, °C | -20 ~ +50 | -20 ~ +50 | -20 ~ +50 | -20 ~ +50 |
| Weight (with battery), g | 399 | 457 | 467 | 560 |
| Dimension, mm | 115x72x76 | 115x72x76 | 115x72x76 | 140x96x78 |
| Connections and Compatibilities | ||||
| Max. Recoil Power on Rifled Weapon (Eo), Joules | 7000 | 7000 | 7000 | 7000 |
| Adapter Interface | M52 | M52 | M52 | M52 |
| Safety Class for LRF | NA | Class 1 | Class 1 | Class 1 |
| LRF Measuring Range, m | NA | 1200, ±1 | 1200, ±1 | 1200, ±1 |
| Ballistic Calculation | Support | Support | Support | Support |
- The actual battery life depends on the use frequency of functions like Wi-Fi, LRF, etc.
– Improvements may be made to the design and software of this product to enhance its features without rior notice.
– The newest user manual can be downloaded at our official website: www.nocpix.com.
2 Package Contents
- MATE Series Thermal Imaging Attachment
- Remote Control Accessories
- MAGIC ZOOM *
- 3×18650 battery *
- Battery charger
- Type-C cable
- Heated target for zeroing * 10
- Lens cloth
- Quick start guide
- Portable bag

Note: 4×18650 battery for MATE ULTRA S60R, 2×18650 battery for MATE LITE L38
3 Description
MATE series is a thermal imaging attachment for outdoor hunting. Designed based on infrared thermal imaging principles, it requires no external light sources during the day and at night, in all hard weather conditions (such as rain, snow, fog, and haze). It can be used without being affected by strong light and to observe even targets behind obstacles (such as branches, grass, and shrubs).
- Integrated LRF
- Ballistic Calculation
- Recoil Activated Video function
- Gallery function
- Remote controller
- MAGIC ZOOM function
- Zeroing by APP
- Built-in memory, supporting photographing, video recording
- Built-in motion sensor
- Shutless function
- Pixel defect correction
4 Features
- 15mK NETD
5 Components and Controls
- LRF
- Lens
- Lens cover
- Lens focus knob
- Power button
- Down button
- Menu button
- Up button
- Battery cover
- Adapter locked ring
- M52 * 0.75 connection thread
- Eyepiece
- Type-C


6 Button Operation
| Button | Current Status | Short Press | Long Press |
Power Button | Powered off | —— | Power on the device |
| Power Button | Home screen | Image calibration | On the Home screen, a 3-2-1 countdown prompt appears. – If the Power button is released during the countdown, the device enters into Standby mode. – When the countdown completes, the device will power off. |
| Power Button | Continuous range | Exit continuous range | On the Home screen, a 3-2-1 countdown prompt appears. -If the Power button is released during the countdown, the device enters into Standby mode. When the countdown completes, the device will power off. |
| Power Button | Shortcut Menu/Main Menu interface | Return to home screen / Return to the previous interface without saving | On the Home screen, a 3-2-1 countdown prompt appears. – If the Power button is released during the countdown, the device enters into Standby mode. – When the countdown completes, the device will power off. |
| Up Button (H38R / H50R / S60R)  | Home screen | Perform a single range | Continuous LRF is ON: Long press Up button to start continuous range Continuous LRF is OFF: Long press Up button and then release it to perform a single range |
| Up Button (H38R / H50R / S60R) | Zeroing interface | Move one pixel to the Up every time | Move 10 pixels to the Up every time |
| Up Button (H38R / H50R / S60R) | Shortcut Menu/Main menu interface | Scroll up options | ….. |
| Up Button (L38) | Home screen | Switch the image mode | …. |
| Up Button (L38) | Zeroing interface | Move one pixel to the Up every time | Move 10 pixels to the Up every time |
| Up Button (L38) | Shortcut Menu/Main menu interface | Scroll up options | …. |
Down Button | Home screen | Short press:UI zooming Double click:Capture | Start video recording |
| Down Button | Zeroing interface | Move one pixel to the Down every time | Move 10 pixels to the Down every time |
| Down Button | Shortcut Menu/Main menu interface | Scroll down options | …. |
Menu Button | Home screen | Enter the Shortcut Menu interface | Enter the Main Menu interface |
| Menu Button | Shortcut Menu interface | Adjust parameters | Save and back to the Home screen |
| Menu Button | Main Menu interface | Adjust parameters / Enter the submenu | Save and back to the Home screen |
| Menu Button | Zeroing interface | Switch the movement direction | Save and back to the Home screen |
7 Power Supply
MATE uses one 18650 battery, the battery should be fully charged before the first use.
Battery Install
Please install the 18650 battery correctly according to the following polarity markings.
Battery Install


Note: The replaceable 18650 battery can be charged by 18650 battery charger or via Type C port.
Safety precautions
- When charging, please use the 5V2A power adapter compatible with the device. Using any other type of adapter may cause irreversible damage to the battery or the adapter itself.
- If the device is not used for a long time, the battery should be partially charged, not fully charged or discharged.
- Do not charge the device immediately after it is moved to a warm environment from a cold environment. Wait for 30 to 40 minutes for preheating.
- Do not use the charger if it is modified or damaged.
- The device should be charged at a temperature of 0°C to +40°C. Otherwise, the battery life will be significantly reduced.
- When charging, please do not leave the battery unattended.
- Do not connect the battery to the power supply for more than 24 hours after it is already fully charged.
- It is not recommended to connect third-party devices that consume more energy than the allowed value.
- The device is equipped with a short circuit protection system, but conditions that may lead to a short circuit should be avoided.
- Use the device at the recommended operating temperature from – 20°C to +50°C. Do not use the device beyond this temperature range, or otherwise, the use may shorten the battery life.
- When the device is used under sub-zero temperature, the battery capacity drops. This is normal and does not indicate a defect.
8 Usage
Powering on and off
- Press and hold the Power button for 2s to start the device. Wait for 3s to complete the startup.
- Rotate the Lens focus ring to focus on the object to be observed.
- On the Home screen, short press the Menu button to enter the shortcut menu.
- Long press the Menu button to enter main menu.
- On the Home screen, press the Power button for image calibration. When performing background calibration, please cover the lens cap.
- Please set the calibration mode in main menu.
- On the Home screen, press and hold the Power button to initiate a 3-2-1 countdown prompt. When the countdown completes, the device will power off.
- If the Power button is released during the countdown, the device will enter Standby mode, indicated by a standby icon.
- On the standby screen, either short press or long press the Power button will wake up the device.

9 Installation
MATE series can be used as a monocular or front attachment for day scope. Original design allows the monocular to be quickly converted into attachment and vice versa.
As a front attachment
MATE as an attachment is designed to use a day scope both in the nighttime and daytime in inclement weather (fog, smog, rain etc.). When use as a front attachment, please ensure MATE is in attachment
mode, in which the status bar at the bottom of the screen
shows profile 1/2/3/4/5/6/7/8. 

As a monocular
- When used as a monocular, it needs to switch to the monocular mode, in which the status bar at the bottom of the screen will not display the profile.
10 Status Bar Icons

- 1.Ultraclear mode status: (
 : The Ultraclear mode is off.
 : The Ultraclear mode is on.)
 - 2.WIFI status (
 : Wi-Fi OFF.
 : Wi-Fi ON)
 - Image calibration status (
 : Auto Calibration.
  : Manual Calibration.
 : Background Calibration )
 - Recoil Activated Video(
 : RAV is OFF.
  : RAV is ON)
 - Time (Set it in the Main Menu or NOCPIX APP)
- Battery (
 )
) - Remote Controller (
 The icon is only displayed when the remote control is connected)
 - Zeroing distance and Profile (You can renamed the profile via NOCPIX APP; such as 100m .308Win)
- MAGIC ZOOM (
 The icon will be displayed when MAGIC ZOOM is connected, and will not be displayed when MAGIC ZOOM is not connected);
 - Horizontal tilt angle
- Vertical tilt angle
11 Zeroing
(only for Attachment mode)
When MATE is installed on the day scope as an infrared extension component, if the target of the infrared image changes from the reticle of the original day scope, you need to use the zeroing function to zero MATE.
- Please finish the zeroing of the day scope firstly before mounting MATE.
- Install MATE on the day scope referring to the Installation section.
- Set the profile to 1,2,3,4,5,6,7 or 8 in “Zeroing” option.

- Select a suitable target distance. The default setting is 100m. You can also modify this distance. You can lso select the zeroing distance, then short press the Menu button to select the LRF mark with the cursor, and then short press the Up button(LRF button) to directly set the actual LRF distance as the zeroing distance directly.

- Shooting at the target, if the POI does not match the reticle of day scope, select the Image Freeze icon in Zeroing menu, short press the Menu button to freeze the image.

- Calibrate the position of the image:
a. Short press the Up or Down button to select Up/Down or Left/Right direction, the selected direction will turn blue.
b. Short press the Menu button confirm the direction. When the direction arrow flashes, short or long press the Up/Down button to move the image on this direction.

c. When the POI matches the reticle of day scope, long press the Menu button to save the position and exit the zeroing interface.

- Shoot again to check the POI matches the reticle of day scope or not. If not, do the zeroing again.
12 Photo and Video Recording
The MATE series supports capture and video recording. Double click the Down button to take a picture, press and hold the Down button to record a video. Each time a photo is taken, the camera icon on the display will flash once. Each time a video is recorded, a camcorder icon will appear on the display, along with the recording time.

Memory access
When the device is powered on and connected to a computer, it will be

recognized by the computer as a flash memory card. Then, you can access the memory of the device and copy images and videos.
- Connect the device to a computer through the USB cable.
- Power on the device.
- Double-click My Computer, double-click to open the device named NOCPIX
 , double-click to open the device name MATE H50R
 to access the memory.
 - There are different folders named by date in the format of xxxx (year) xx (month) xx (day) in the memory.
- Recorded photos and videos in that day are saved in the folders.
- Select desired files or folders to copy or delete..
13 UI zooming
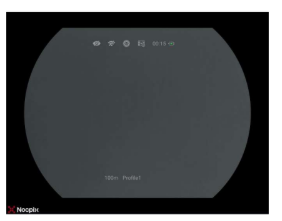
In order to adapt to different day scopes with different magnification, MATE has 4 different UI gears, and you can short press the Down button to switch different UI gears;



14 LRF (MATE ULTRA S60R / MATE H50R / MATE H38R)
Within the LRF option in the main menu, you can choose to turn on or off the Continuous LRF function.
- When Continuous LRF is ON, short press the Up button for single ranging, long press the Up button for continuous ranging
- When Continuous LRF is OFF, short press the Up button for single ranging, long press the Up button and release it to trigger single ranging.
Note: Ballistic Calculation can only be performed when performing single ranging.


15 MAGIC ZOOM (MATE ULTRA S60R / MATE H50R / MATE H38R)
The MATE series supports the MAGIC ZOOM function, which has two functions:
- During the day scope zooming in, the UI icon can always be seen through the eyepiece of the day scope
- During the day scope zooming in, the image quality will be improved by R+ automatically when observing through the high-magnification day scope Connection:(When you receive a new MATE, MAGIC ZOOM and
MATE are already connected in factory. If you replace a new MAGIC ZOOM accessories or upgrade the MATE program in the future, MAGIC ZOOM needs to be connected to MATE again)
- Install MATE in front of the day scope; select a suitable strap to fix MAGIC ZOOM on the magnification adjustment ring of the day scope; and install the battery of MAGIC ZOOM;


2. Turn on MATE, press and hold the power button of MAGIC ZOOM for 3 seconds, the MAGIC ZOOM light will turn green and then turn off, indicating that MAGIC ZOOM has been turned on;
- After the MAGIC ZOOM is turned on, short press the MAGIC ZOOM power button for 6 times in a row. The red light will flash for each of the first 5 short presses. After the 6th short press, the red light will turn
on for 3 seconds and then turn off, indicating that MAGIC ZOOM has started to connect with MATE; (Press the power button of MAGIC ZOOM 6 times should be within the first 90 seconds of MATE turning on) - Wait for 10 seconds, the MAGIC ZOOM icon will appear in the bottom right corner, indicating that MAGIC ZOOM has been successfully connected to MATE;
- After the connection is successful, short press the MAGIC ZOOM power button. The green light indicates that the battery is full power, and the red light indicates that the battery needs to be charged in time;

Calibration:
- Open the MAGIC ZOOM option in the main menu, and the prompt “MAGIC ZOOM Calibration?” will pop up. Press the Menu button to select Yes to perform MAGIC ZOOM calibration; or select No to exit the calibration process. During the calibration process, please keep the rifle within 30 degrees of vertical tilt angle.


- Please make sure the MAGIC ZOOM has been fixed on the magnification adjustment ring of the day scope, then click “NEXT” by Menu button.

- Please adjust the day scope to 3X, then click “NEXT” by Menu button, (If your day scope does not have a 3X magnification, please adjust it to the closest magnification to 3X)

- Please adjust the day scope to 6X, then click “NEXT” by Menu button, (If your day scope does not have a 6X magnification, please adjust it to the closest magnification to 6X)

- Please adjust the day scope to 9X, then click “NEXT” by Menu button, (If your day scope does not have a 9X magnification, please adjust it to the closest magnification to 9X). Then the prompt “Calibration completed, Let’s start MAGIC ZOOM” will pop up, indicating that MAGIC ZOOM has been calibrated and can be used normally.
Note:
After MAGIC ZOOM is calibrated, if the battery is low, just replace a MAGIC ZOOM battery, don’t remove MAGIC ZOOM from the day scope.
16 Remote
The MATE series supports Remote function, when you receive a new MATE, Remote and MATE are already connected in factory. If you replace a new Remote accessories in the future, Remote needs to be connected to MATE again.
17 Shortcut Menu
Short press the Menu button to open the Shortcut Menu; Within the Shortcut Menu options, press Up or Down button to switch between different shortcut menu options. Icons change from white to blue when a Shortcut Menu option is selected. Press the Menu button to adjust the parameter settings of the Shortcut Menu; If there is no operation for 7 seconds, the Shortcut Menu will exit automatically. You can also exit the Shortcut Menu by pressing and holding the Menu button or pressing the Power button. Within the Shortcut Menu options, you can perform the following settings:
– Color mode:short press the Menu/Up or Down button to switch the image mode
–Brightness: short press the Menu /Up or Down button to switch the screen brightness from level 1 to level 6.
-Image Contrast: short press the Menu/Up or Down button to switch the image contrast from level 1 to level 6.
–Image Sharpness: short press the Menu/Up or Down button to switch the image sharpness from level 1 to level 6
–Ultra Clear:short press the Menu/Up or Down button to switch the Ultra Clear to ON or OFF
–Image Hue:short press the Menu/Up or Down button to switch the Image Hue to warm or cold
–Pre set BC distance:short press the Menu/Up or Down button to Pre set BC distance as 200m/225m/250m/275m/300m/OFF
Color Mode
- Within the Color Mode options, short press the Menu button to switch between different color modes.
- The color modes include: White Hot, Black Hot, Red Hot, Rainbow, Violet, Crimson, and Viridian.
- Note: Only the MATE H38R / H50R/ S60R models have the Color Mode option in Shortcut Menu.

Brightness
- Within the Brightness options, short press the Menu button to switch between different screen brightness levels.
- Screen brightness has 6 levels to choose from, we recommend a screen brightness of 3
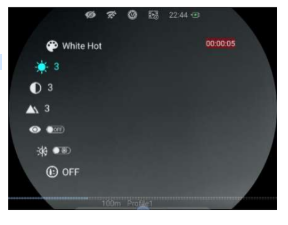
Image Contrast
Within the Image Contrast options, short press the Menu button to switch between different Image Contrast levels.
- Image Contrast has 6 levels to choose from, we recommend a contrast level of 3.

Image Sharpness
- Within the Image Sharpness options, short press the Menu button to switch between different sharpness levels.
- Image Sharpness has 6 levels to choose from, we recommend a sharpness level of 3.

Ultra Clear
- Within the Ultra Clear options, short press the Menu button to switch Ultra Clear mode as ON or OFF. We recommend to enable Ultra Clear mode on cloudy and rainy days to effectively enhance image quality.

Image Hue
- Within the Image Hue options, short press the Menu button to switch Image Hue as Warm or Cold. Cold hue mode Image will be more contrast, more hierarchy, and more obvious targets. Warm hue mode Image will be softer. It can reduce the visual fatigue of the observer, and long time observation is not dazzling.

Pre-set BC Distance
For MATE LITE L38, as well as in extremely severe rainy and snowy weather conditions for MATE H38R / MATE H50R and MATE ULTRA S60R when the ranging performance is reduced, you can pre-set the BC distance within this option, and continue to use the BC function.
- Within the Pre-set BC Distance options, short press the Menu button to switch the BC Distance as 200m/225m/250m/275m/300m/OFF.
- When OFF is selected, the Pre-set BC Distance function is OFF.
- When 200m/225m/250m/275m/300m is selected, Ballistic Calculate will be performed according to the selected distance.

Pre-set BC Distance
The distance can be modified within Zeroing – Profile – BC Distance.
- When “+” is selected, press and hold the Menu button to add a new BC Distance.
- When Pre-set BC Distance is enabled, short-press the Power button, Standby,press the Menu button, or shutting down the device will automatically exit BC Distance.

18 Main Menu
Press and hold the Menu button to open the Main Menu; Within the Main Menu options, press Up or Down button to switch between different main menu options. Icons change from white to blue when a Main Menu option is selected. Press the Menu button to adjust the parameter settings of the Main Menu; If there is no operation for 7 seconds, the Main Menu will exit automatically. You can also exit the Main Menu screen by pressing and holding the Menu button or pressing the Power button.
WIFI
- Within the WIFI option, press the Menu button to enable or disable WIFI / N-link function.
WIFI:
- After the Wi-Fi function is on, search for the Wi-Fi signal with the name “MATE H50R_XXXXXXX” on the mobile device.
- Select the Wi-Fi and enter the password to connect. The initial password is 12345678.
- When Wi-Fi is successfully connected, it supports to control the MATE via the NOCPIX APP downloaded in the mobile device.
- Setting Wi-Fi name and password
- The name and password of the Wi-Fi in MATE series can be reset on the Nocpix app.
- After the scope is connected to a mobile device, locate and click the ‘Settings’ icon on the Nocpix image screen to enter the WiFi setting interface
- In the text box, enter and submit the new Wi-Fi name (SSID) and password.
- It needs to reboot the device to take the new name and password effect.
Note: If the device is reset to the factory settings, the name and password of the Wi-Fi will also be restored to the default settings.
WIFI
N-link:
- The N-LINK feature enables interconnection between two NOCPIX- branded devices, allowing them to exchange ranging data. If the paired device lacks an LRF (Laser Range Finder) function, N-LINK can share ranging information to achieve distance measurement sharing and ballistic calculation.
- Turn on the WIFI function of another NOCPIX device that supports N- LINK function.
- Turn on the N-LINK function of the MATE device, find the hotspot name of the WiFi device, and press the M key to confirm the connection. After the connection is successful, there will be a √ sign.
Note: In this connection process, no matter who is connected to whom, the interconnection function can be realized.
- For MATE rangefinder models,, short press the LRF button to perform a single ranging.
- At this time, the interconnected device will receive the single ranging number and the current screen transmitted by MATE.
- If the Ballistic calculation function is turned on in another device, the Ballistic calculation can be performed through the transmitted ranging number.


Zeroing
- Within the Zeroing option, press the Menu button to enter Zeroing. Please refer to Zeroing section for details


Zeroing
- Set the Ballistic Calculation to ON or OFF

- Set the BC unit to MOA or mil, cm or inch

- Set the BC Image Calibration as ON or OFF.
– When BC Image Calibration is OFF, MATE will prompt the offset of the bullet point based on the result of the Ballistic Calculation;
Zeroing
As shown in the figure, the zeroing distance is 100m, and the BC result of 145m is 2.7cm up. The hunter needs to calculate the scale value marked on the day scope for 2.7cm up, then aim and shoot according to the new
scale position on the day scope;
– When BC Image Calibration is ON, MATE will automatically adjust the zeroing distance to the actual LRF distance based on the result of BC, without displaying the offset of the POI. Hunters do not need to calculate and can still aim via the reticle center of the day scope. As shown in the figure, the zeroing distance has been set to 146m according to the actual LRF distance, and there will be a prompt of “BC Image Calibrated” “Zeroing Distance: 146m”;
– There are the following ways to exit the current BC Image Calibrated mode and return to the default eroing distance:
- Press power button to exit
- Enter Shortcut menu or main menu
- Tilt MATE to be standby
The prompt of “BC Image Calibrated” “Zeroing Distance:146m”will disappear,it indicates that the BC Image Calibrated mode is exited, and restore to your initial zeroing distance of 100m

Zeroing


Zeroing
- Set the BC Parameters
BC Parameters can also be adjusted through the NOCPIX APP


- Pre-set BC Distance
BC distance includes 200m / 225m / 250m / 275m / 300m, after selecting the distance, you can press the Menu button to modify the distance value. The modified distance value will be synchronized to the shortcut menu.
Zeroing


- Set Ref. Line color
Zeroing
The Ref. Line color can be set to Blue/ Green/ Red/ White/ Black

- Ref. Line calibration You can calibrate the Ref. Line to coincide with the crosshairs of the day scope


Zeroing

Laser Rangefinder
- Within the Laser Rangefinder option, you can change the Color of LRF Mark.
- Within the Laser Rangefinder option, you can change the Brightness of LRF Mark.

- Continuous LRF can be set ON or OFF,
– When Continuous LRF is ON, Short press Up button,perform a single ranging,SGL: xxxm will be displayed;
Laser Rangefinder
Long press Up button,perform a continuous ranging,CONT: xxxm will be displayed. BC is disabled in continuous ranging mode;
– When Continuous LRF is OFF, Short press Up button,perform a single ranging,SGL: xxxm will be displayed; Long press Up button,move the LRF Mark to the target, then release the Up button to trigger a single ranging, and SGL: xxxm will be displayed;
Recoil
- Within the Recoil option, you can set Recoil Activated Video ON or OFF.

- When RAV is enabled, shooting automatically triggers video recording. The device will save the video footage 10 seconds before and 20 seconds after the shot.
-The video recorded by long pressing the Down button is named VID_xxx;
– The video recorded by RAV trigger is named RAV_:
– When the RAV_ video is generated, a video named _SLOW is also generated. It is a slow-motion video of the bullet shooting moment, which can be used to view the details of hitting the target.
Recoil
- You can set different sensitivity in the Recoil sensitivity option,there are 6 levels of recoil sensitivity to choose from. The smaller the value, the easier it is to trigger the recoil recording, which is suitable for a smaller bullet. The larger the value, the harder it is to trigger the recoil recording, which is suitable for a larger bullet; The factory default level is 3;

Calibration
- Within the Calibration option, you can select 3 calibration types, including: Auto Calibration (A) Manual Calibration (M) Background Calibration (B) The factory default mode is M. Note: When performing a Background Calibration, you need to cover the lens cap according to the prompts.

MAGIC ZOOM
When MAGIC ZOOM is connected successfully, this icon is enabled, and MAGIC ZOOM can be calibrated within this option. When MAGIC ZOOM is not connected, this icon is disabled and gray. Please refer to the MAGIC ZOOM section for details.
Microphone
- Within the Microphone option, press the Menu button to enable or disable the Microphone. When Microphone is off, there is no sound in the recorded video.

Standby
- Within the Standby option, press the Menu button to enable or disable the standby function.
- When Standby mode is enabled, the device will automatically enter Standby mode to save power if the vertical tilt angle exceeds 70° or the horizontal tilt angle exceeds 30°.
- We recommend setting the standby mode as ON, which will extend the battery life, when you find the wild boars, it will automatically wake up and you can aim and shoot quickly.

Pixel Defect
Correction
When using the MATE, you may see pixel defects, such as visible light spots or dark spots with stable brightness. To address this problem, use the Pixel Defect Correction function to remove the pixel defects.
- Within the Pixel Defect Correction option, select to do automatic Pixel Defect Correction.
- If there are very few Pixel Defect that cannot be corrected by automatic defect correction, you can move the scale to the position of the pixel defect , short press the Menu button to mark or cancel the location marked, the corresponding number will increase or decrease by 1, then long press the Menu button to save and exit.


Motion Sensor
- Within the Motion Sensor option, press the Menu button to enable or disable the Motion Sensor.
- When the motion sensor is ON, the horizontal scale representing the tilt angle is displayed on the bottom side, the vertical scale representing the pitch angle is displayed on the right side.

Gallery
- Within the Gallery, video and photo files are arranged in folders by date.
- After entering a folder, select a video file, and press the M button to play the video file.

- Within the Eyepiece, you can switch MATE to Clip on mode or Monocular mode.
Eyepiece

Note: The factory default is Clip on mode. Please make sure that MATE is in Clip on mode before installing on day scope.
Setting
Date
Set system date
- Within the Date option, short press the Menu button to switch the Year / Month / Day option;
- Press the Up or Down button to adjust the value of Year / Month / Day.
- After the adjustment is completed, press and hold the Menu button to save and exit Date option.

Setting
Time
Set system time
- Within the Time option, short press the Menu button to switch the Hour / Minute option;
- Press the Up or Down button to adjust the value of Hour / Minute.
- After the adjustment is completed, press and hold the Menu button to save and exit Time option.

Setting
Languages
Set system languages
- Within the Languages option, press the Up or Down button to switch different languages.
- Languages available for the MATE series include English, Deutsch, Italiano, Français, Español, Čeština,