Products:

PRIMARY ARMS SLx MD-25 RED DOT SIGHT
The SLx MD-25 is the most advanced red dot sight that we have ever made so far. The core of the sight is its ultra-high-power LED emitter, which projects a clear reticle—even in intense sunlight. The 25mm aperture is crystal clear, providing a wide edge-to-edge field of view without a blue tint. 2 Night Vision settings make this dot versatile in low-light applications, and the durable mounting system ensures that your dot will stay zeroed through impacts and heavy use. One battery provides 50,000 hours (at a medium setting) of use, making this optic perfect for always-on personal defense setups. This version of the MD-25 uses a 2MOA dot reticle (MPN: 810005), but an ACSS reticle option (MPN: 810007) is also available for this red dot sight.
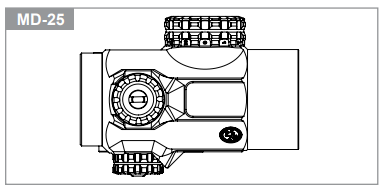
RED DOT SIGHT BODY
HOW TO ACHIEVE A CLEAR RETICLE PICTURE
If you wear prescription glasses or contact lenses, make sure to put them on before looking through the sight. To achieve a clear, crisp dot, look through the sight and focus on the target, not the dot. Shoot with both eyes open! It can also be helpful to turn the dot’s brightness down a bit, until the dot can just be seen clearly contrasted against the background.
HOW TO SET RETICLE ILLUMINATION
Your red dot comes with a total of eleven brightness settings, two of which are night vision compatible. The night vision settings are unable to be seen by the naked eye and can only be viewed through a separate night vision device. The large indicator notch makes it easy to determine your brightness setting. The illumination knob can be turned infinitely in either direction, ensuring the shortest path to your desired illumination regargless of the current illumination setting. To turn illumination off, simply return the dial to the off position.
ZEROING
The optic is delivered in a centered position. Normally, this means that only small adjustments are necessary, providing that the base is properly aligned. If you have a red dot magnifier, sight in without using the magnifier. Work your way to “zero” by adjusting each turret only a few clicks at a time. Remove the windage and elevation adjustment caps and use the tabs built into the cap tops to turn them as follows:
- To move the point of impact to the right, turn the windage adjustment screw counterclockwise.
- To move the point of impact to the left, turn the windage adjustment screw clockwise.
- To move the point of impact up, turn the elevation adjustment screw counterclockwise.
- To move the point of impact down, turn the elevation adjustment screw clockwise.
Every click will shift the position of the dot by 0.5 MOA. The maximum total adjustment range for both windage and elevation is 50 MOA. If you suddenly encounter resistance, do NOT try to force the screw further, this can break the mechanism and render the sight unable to zero. Confirm zero by firing at least three shots at a zeroing target. After initial firing, check that the optic and mount are secure on your firearm. Check your impact points on the target to confirm accuracy and repeat until you are satisfied that the point of aim and the point of impact coincide at your desired range.
MOUNTING OPTIONS (compatible to industry standard micro mounts)
SLx MD-25 includes a standard riser, low base and 2 spacers (two thicknesses), torx screws for riser/spacers, and torx wrenches.
- Use riser (as assembled) for 1.41” center-line height.
- Use riser and thin spacer to achieve 1.535” center-line height.
- Use riser and thick spacer to achieve 1.64” center-line height.
- Use low base to achieve 0.96” center-line height.
DOT SIZE & MAGNIFIER USE
SLx MD-25 features a 2 MOA dot, meaning that the dot itself appears to cover roughly 2 inches of target at 100 yards. The 2 MOA dot offers an excellent compromise of both speed and accuracy.
Magnifiers can be placed behind the microdot unit, resulting in a sight picture comparable to a traditional magnified scope. When looking through the magnifier and red dot sight picture, the dot will appear to “grow” in size. The dot always stays the same size relative to the target; magnification makes it appear larger. With the magnifier in place, iron sight co-witnessing is no longer possible. Magnifiers are often mounted in quickdetach or quickflip mounts allowing them to be removed from the rail or flipped out of the shooter’s line of sight quickly when not in use. Primary Arms carries a full line of red dot magnifiers.

SLx RED DOT FEATURES
- 11 Brightness Settings, Including 2 Night Vision Settings
- Super Bright High Efficiency LED
- 50,000 (2 MOA Dot) / 12,000 (ACSS Reticle) Hours Battery Life
- Zero Parallax Lens
- Clean Sight Picture with Almost No Feedback or Reflection Even at Highest Brightness Settings
- Large 25mm Clear Aperture in a Compact and Light Weight Design
- Integrated Turret Adjustment Tab on Removable Turret Caps to Adjust Windage and Elevation
- ARD Accommodations
- High Strength Proprietary Riser Mount and Low Mount with Spacers to Achieve Different Heights
- Fully Nitrogen Purged, IP67 Waterproof and Dust Proof
- 6061-T6 Main Body and Components with Hard Coat Anodizing
- Designed and Manufactured to Handle Extreme Recoil
- Backed by our Lifetime Warranty
LENS CARE
Please do not use any organic solvent such as alcohol or acetone on your optic. First, blow dust or any foreign objects off of the lens. Then, use a soft cotton or microfiber lens cloth to clean any
fingerprints or smears off the lens. Alternatively, you may use a piece of professional lens paper for further cleaning, if necessary.
WARNING: Always ensure your firearm is unloaded (chamber empty and magazine removed) before installing optics or accessories.
WARNING: Improper installation of firearm parts or accessories may result in death or serious personal injury. If you are not properly trained in the installation of these parts, have them installed by a gunsmith or armorer.
REMEMBER: THE FOUR RULES OF FIREARMS SAFETY
- Treat every firearm as if it were loaded.
- Never let your muzzle cover anything you are not willing to destroy.
- Keep your finger off the trigger until your sights are on target.
- Be sure of your target and what is behind it.


what battery is used in the ms-25?
it is not mentioned any where i have looked.
Thanks
MD-25 uses a CR2032 battery.