Products:
Red Dot Reflex Sight
Congratulations on purchasing the Burris® FastFire 3! This versatile red dot reflex sight will be the perfect fast-action sighting solution for your handgun,rifle or shotgun.You will enjoy the following features in your FastFire 3 sight:
• Compact & Lightweight. Weighing less than 1 ounce,the FastFire 3 won’t affect firearm balance or handling.The frame is built from stainless steel,bronze, and anodized aluminum for ultimate reliability and recoil resistance.
• 1x Magnification. The parallax-free, 1x FastFire 3 allows for both-eyesopen shooting, for enhanced awareness and better accuracy.
• Bright Red Aiming Dot. Allows for fast target acquisition and easy aiming.
• 4 Brightness Settings. The Automatic Brightness Setting automatically adjusts the brightness of the red dot to match the environmental conditions, while 3 manual brightness settings let you control the intensity of the red dot.
• Windage & Elevation Adjustments. Fine-tune your point-of-aim with no special tools required.

Operating Instructions
For optimum performance and to prevent damage to this precision instrument, carefully follow all instructions.
Package Contents:
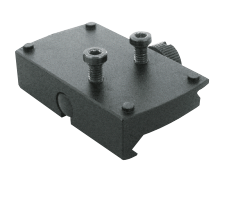
• 2 #6×48 Screws with Torx® socket head for installing the sight on the mounting plate
• 1 Torx® Wrench
• 1 Protective Cover
• 1 Lithium Battery 3V (CR1632)
• User Guide
• Weaver/Picatinny-style Mount (on select models)
Specifications:
• Magnification: 1.07x
• Sight Window: 21mm x 15mm; .82″ x .59″
• Elevation adjustment range: 115 MOA
• Windage adjustment range: 86 MOA
• Set value for one scale division: 1 MOA
• Subtension of the aiming dot: 3 MOA or 8 MOA (depending on model)
• Recoil resistance: At least 1000 G’s
• Operating Temperature Range: -10°F to +130°F (-25°C to +55°C)
• Storage Temperature Range: -40°F to +160°F (-40°C to +70°C)
• Power Supply: 3V with one CR1632 Lithium battery
• Dimensions: (LxWxH) 1.9″ x 1.0″ x 1.0″ (48.2mm x 25.4mm x 25.4mm)
• Weight (in operating condition without mounting materials): 0.9 oz. (25 grams)
Cautions and Warnings
Make sure the firearm is unloaded before mounting the optic.Do not look through the sight directly into the sun, light arcs or other very high-intensity lightsources.Keep away from children.
Remove dirt by blowing it off or use a very soft lens brush.Use lens cleaning tissues on the optical surfaces.
Battery Installation
The FastFire 3 operates with one commercially available 3V Lithium battery (CR1632).Do not attempt to substitute two CR2016 batteries. To insert or replace the battery, unscrew the battery cap on the top of the sight using a slot head screwdriver. Make sure that that the positive pole of the battery is facing up. Replace the battery cap, but do not over tighten. Keeping the battery contact surfaces clean will ensure reliable operation.

Installation
Installation on most rifles, carbines, and some handguns require the included Picatinny/ Weaver Mounting Plate. Most other handguns, shotguns and rifles require a different mounting plate. See chart and special instructions below.
410335 Mount – Picatinny / Weaver (included)
410330 Mount – Picatinny Protector
410348 AR-F3 Mount for flat top AR receivers
410321 Mount – 1911 Standard
410322 Mount – 1911 Adjustable / Novak
410323 Mount – Kimber Standard & Bomar
410324 Mount – Beretta 92/96 /90-TWO/ Taurus PT99
410325 Mount – Beretta PX4 Storm
410326 Mount – Glock – all
410327 Mount – Sig Sauer P226
410328 Mount – Springfield XD
410329 Mount – Ruger Mark I, II, III
410331 Mount – Sako (requires Picatinny Mount)
410332 Mount – Ruger M77 and No. 1Rifles, Super Redhawk and Super Blackhawk Hunter
410334 Mount – Winchester Model 94, pre-drilled & tapped
410333 Mount – Marlin Lever Rifle, Models 336, 444, 1895, pre-drilled & tapped
410336 Mount – Smith & Wesson M&P
410635 Xtreme Tactical Base – Sako Rifles (also requires Picatinny mount)
Picatinny / Weaver Mount
To install the FastFire 3 on a Picatinny or Weaver-style base, loosen the clamp nut on right side of the mount. Place the mount on the rail with the cross screw in the desired slot. Check to be sure all the clamping edges are engaged. Keep a little pressure on the sight toward the muzzle as you tighten the clamp nut to approximately 20 in-lbs.

AR-F3 Mount
Place the AR-F3 mount on the rail with the cross bolt engaging the desired slot. A more rearward position will maximize field of view.Using the provided wrench,tighten the nut on the mount to 20 in-lbs.Using the provided Torx® wrench, install the FastFire on top of the mount. Tighten screws to 12 in-lbs.
Operating Procedure
Elevation and Windage Adjustment
There are separate adjustment screws for elevation and windage.The elevation adjustment screw is located on the top of the sight, and the windage screw is located on the right side.The
windage adjustment mechanism has limit stops at both ends. Screwing either adjustment into a stop will lock motion of the other adjustment.
Zeroing the Point-of-Impact
Adjust the point-of-impact by using a small slot screwdriver or coin.The direction of the shift of the point-of-impact is indicated on the elevation and windage adjustment screws.One tick mark on either adjustment screw corresponds to 1 minute of angle (MOA), or approximately 1 inch at 100 yards. For other distances,this value is proportional, for example: .5 inch at 50 yards or 0.1 inch at 10 yards.
Power Modes
The power button is located on the left side of the sight. For greater versatility to accommodate any light condition,there are four settings that can be used to adjust the brightness of the red dot each time the button is pushed.These include:
#1 – Automatic adjustment. A light sensor automatically senses the surrounding light conditions and adjusts the brightness so that it is not overpowering in low light, yet visible in bright daylight.
#2 – Highest brightness setting
#3 – Medium brightness setting
#4 – Lowest brightness setting
To turn the power off,simply press the power button once more to completely shut off the electrical circuit and save your battery. If the battery life falls below the limit of 4 hours,the light dot will
begin to blink twice every 5 seconds.ž
Integrated Control Electronics
The integrated control circuit adjusts the brightness of the aiming dot according to surrounding light levels.The brightness sensor on the front of the sight senses the light level in the direction of the target and modifies the intensity of the dot accordingly so that it is not overpowering in low light while remaining highly visible in bright daylight. Be careful not to obstruct the sensor. Clean if
necessary. Covering the sensor with your finger will affect the electronics only slightly. If you wish to check its function, cover the sensor with the protective cover.
Ambient Conditions
The FastFire 3 is water-resistant and will withstand rain or snow. It is also usable even after being accidentally submerged.However, after exposure to salty or dirty water, it is advisable to rinse with distilled water and dry the sight, as with any quality optical equipment.


