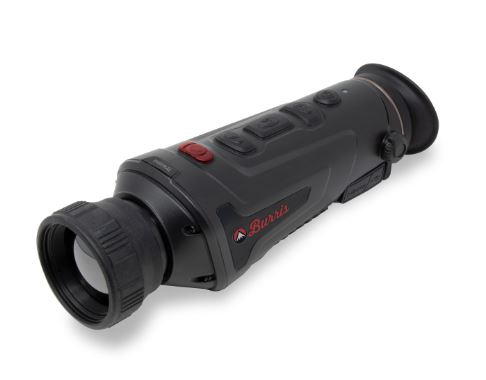
- Burris BTH50 Thermal Hand Held Sight
- Burris BTH35 Thermal Hand Held Sight
- Burris BTH25 Thermal Hand Held Sight
Congratulations on your purchase of a Burris Thermal Hand Held Sight. Review this manual
thoroughly before using and keep it available for future reference. This guide explains the
operation of the BTH 25, BTH 35 and BTH 50 models.
Cautions
- Do not directly expose the thermal imager to high intensity light sources such as the sun, carbon dioxide lasers and electric welding machines.
- The thermal imager combines precision optical instruments and electrostatically sensitive electronics, any abuse of the thermal imager and its accessories can compromise performance and longevity and may void the warranty.

Technical Specification
| MODEL | 25 mm | 35 mm | 50 mm |
| Detector | |||
| Resolution | 400×300 | 400×300 | 400×300 |
| Pixel Size | 17µm | 17µm | 17µm |
| Optical properties | |||
| Focal length | 25mm F1.2 | 35mm F1.2 | 50mm F1.2 |
| Focusing | Manual Focus | Manual Focus | Manual Focus |
| Visual angle | 15.4×11.6 | 11.1×8.3 | 7.8×5.8 |
| Imaging | |||
| Frame Rate | 50Hz | 50Hz | 50Hz |
| Digital Zoom | 1×—4× | 1×—4× | 1×—4× |
| Display | |||
| Eye lens | 1280×960 color LCOS | 1280×960 color LCOS | 1280×960 color LCOS |
| Visibility regulation | -4~+2 | -4~+2 | -4~+2 |
| Machine magnification | 1.7—6.8× | 2.3—9.2× | 3.3—13.2× |
| Power | |||
| Adapter | 5V DC Special adapter charging | 5V DC Special adapter charging | 5V DC Special adapter charging |
| Working hours | ≥5 hours @25°C | ≥5 hours @25°C | ≥5 hours @25°C |
| Interface | |||
| USB | TYPE C, for Power In/ File Transfer | TYPE C, for Power In/ File Transfer | TYPE C, for Power In/ File Transfer |
| Video Interface | Micro HDMI | Micro HDMI | Micro HDMI |
| External Connection | Picatinny rail | Picatinny rail | Picatinny rail |
Product Function
| MODEL | 25 mm | 35 mm | 50 mm |
| Smooth zoom | YES | YES | YES |
| Photo | YES | YES | YES |
| Video | YES | YES | YES |
| Wi-Fi | YES | YES | YES |
| Screen brightness | 1~10 levels | 1~10 levels | 1~10 levels |
| Image brightness | 1~10 levels | 1~10 levels | 1~10 levels |
| Image contrast | 1~10 levels | 1~10 levels | 1~10 levels |
| Image enhancement | YES | YES | YES |
| Scene mode | Enhanced/ Highlight/ Nature | Enhanced/ Highlight/ Nature | Enhanced/ Highlight/ Nature |
| Super energy saving | YES | YES | YES |
| Color palettes | White hot/ Black hot /Red hot/ Iron/ Blue hot | White hot/ Black hot/ Red hot/ Iron/ Blue hot | White hot/ Black hot/ Red hot/ Iron/ Blue hot |
| Hot track | YES | YES | YES |
| Working indication | Adjustable | Adjustable | Adjustable |
| Charging indication | Adjustable | Adjustable | Adjustable |
| Calibration model | Automatic/ Scene/ Shutter | Automatic/ Scene/ Shutter | Automatic/ Scene/ Shutter |
| Stadiametric rangefinder | YES | YES | YES |
| Auto power-off | YES | YES | YES |
| Auto Stand-by | YES | YES | YES |
| Language settings | English/ Russian/ German/ French/ Chinese | English/ Russian/ German/ French/ Chinese | English/ Russian/ German/ French/ Chinese |
| Time settings | YES | YES | YES |
| Watermark settings | YES | YES | YES |
| PIP | YES | YES | YES |
| Restore default | YES | YES | YES |
| Memory card formatting | YES | YES | YES |
Button Function
| BUTTON | DEVICE CURRENT STATUS | SHORT PRESS | LONG PRESS |
| Power button | Power-off | / | Power on |
| Power on | Calibration | Display off | Power-off | |
| Display off | Display on | / | |
| Up Button | No display in the menu bar | Switch to scene mode | Zoom in |
| Display in the menu bar | Upward switching options | Change parameter value | / | |
| M Menu Button | No display in the menu bar | Enter the shortcut menu | Enter the main menu |
| Display in the menu bar | Enter the sub-menu | Select Option Parameter Value | Exit the menu bar / back to the previous menu | |
| Down Button | No display in the menu bar | Switch to color palettes mode | Zoom out |
| Display in the menu bar | Downward switching options | Change parameter value | / | |
| Photo / video | Photo mode | Photo | / |
| Video mode | / | Start video recording / Stop video recording |
NOTE – Users can adjust the device language according to their needs, English/ Russian/ German/ French/ Chinese for choose.
Shortcut Menu
- Press the M button to enter the shortcut menu.
- Press the Up/Down button to switch between PIP, Screen BRI, Stadiametric Rangefinder, Hot track and energy-saving modes
Picture In Picture (PiP)
- With the PIP window open, select the left / middle / right for placement.
- The window image is 2X magnification of the main image.
Screen Brightness
Brightness levels can be adjusted from 10 to 100 percent.
Stadiametric Rangefinder
The stadia metric rangefinder lets you estimate the distance of a target . There are three stadia available on the device – Rabbit (35 cm / 13.7 in.), Boar (35 cm / 13.7 in.), Deer (35 cm / 13.7 in.).
How to use the stadia:
- Align the lower horizontal line with the bottom of the target image, press the Up/Down button to change the width between the upper and lower horizontal lines until the upper horizontal line is aligned with the top of the target icon.
- The distance can now be calculated and displayed automatically.
- By comparing the target size with the three reference animal sizes, the user can roughly calculate the distance of the target.
Hot Track
When hot track is turned on, the active crosshair tracks the point with the highest temperature in the scene.
Super Energy-Saving Mode
In the super energy-saving mode, screen brightness is reduced to 30 percent and the WiFi is turned off.
When the Super energy-saving mode is off, the screen brightness and WiFi are restored to their original state.
NOTE – If WiFi cannot be turned on, please check if the super energy-saving mode is off.
Main Menu
Press and hold the M button to enter the main menu
Press the Up/Down button to switch between Image quality adjustment, Calibration mode, WiFi, power saving settings, indication settings, general settings and other settings.
Image Quality Adjustment
Image enhancement – When the image enhancement is turned on, the image of the target can be enhanced.
Scene mode – Image brightness and contrast can be adjusted for each scene mode to achieve the best image.
Color Palettes
White hot – The objects with higher temperature show in white or light gray
Black hot – The objects with higher temperature show in black or dark gray
Red hot – The objects with higher temperature show in red
Adjustable red hot – The objects with higher temperature show in red. Users can adjust the intensity of range of red heat from level 1 to 10
Iron – The objects with higher temperature show in iron red
Blue hot – The objects with lowest temperature show in blue or dark blue, and the object with higher temperature shows in red
Brightness
Adjustable from level 1 to 10 level.
Contrast
Adjustable from level 1 to 10 level.
Calibration Mode
Automatic – The device automatically corrects the image quality without any action
Scene – The user manually corrects the image quality as needed. For manual correction, the lens cover needs to be attached before calibration
Shutter – The user manually corrects the image quality as needed and the device shutter closes for calibration.
Wi-Fi
It can be connected to the mobile phone via WiFi and the thermal imager can be operated remotely via the mobile phone APP. When WiFi is turned on, but not connected, the WiFi icon flashes and the WiFi name is displayed at the top of the screen. When the WiFi is connected, the WiFi icon is always on.
Mobile phone APP – Search and download ‘Burris Thermal’ APP in the mobile phone app market. Open the app, and find the WiFi name of “Burris BTH” in your mobile phone WiFi settings, enter the password ‘12345678’, then after the connection is successful, the user can operate remotely.
• Android – Please search and download in Google play.
• IOS – Please search and download in the APP store.
Power Savings Settings
Auto Stand-By – If there is no operation in the setting time, it enters Stand-by mode. If the work indicator is on before entering Standby mode, the work indicator will flash in Stand-by mode.
Auto Power – If there is no operation in the setting time, it will power off automatically.
Note – Auto Stand-by and Auto power-off cannot be performed while WiFi is connected.
Indication Settings
Charging indication – In the charging state, you can turn the charging indicator on or off.
Working indication – In the normal working state, you can turn the working indicator on or off.
General Settings
Time style – Select 12-hour or 24-hour style.
Date style – Choose different date styles according to your preference.
Time setup – Adjust the current date and time.
Watermark Settings
Users can choose the display style of date and time watermark on the screen.
Language Settings
Language choices include English/ Russian/ German/ French/ Chinese.
Memory Card Formatting
Allows the use to format and empty onboard storage.
Restore Default
This function restores the factory settings.
Other Settings
Optional accessories feature settings.
- Ranging
- Ranging adjustment
- Pointer
- Pointer adjustment
These functions are used for auxiliary Optional accessories. There are differences between the individual models. For details, please refer to the accessory manual.
Charging
When using the thermal imager for the first time, use the USB charger to charge battery for at least four hours. When charging, insert the matching Type C USB charging cable and plug in the power.
Charging specifications: 5V, 2A. Charging indicator is red during normal charging. Charging indicator is green when charging is complete.
Do not charge the battery in an environment over 40˚C or 104˚ F.
Note – Charging when the thermal imager is being used does not charge the battery. This icon indicates the unit is using the external power for normal operations.

This icon indicates that the external power supply is charging the battery.

Video Output
There is a video output port beside the USB interface on the side of the thermal imager, and is simply plug and play.
The screen image of the thermal imager can be output to an external screen through the matching HDMI video cable. There are two display modes, either the external screen or the screen of the device, but only one mode is active.
Note – When HDMI is used to connect the external display screen, the real-time screen can only be viewed by the external display. There is no screen display on the screen of this device. When the HDMI cable is unplugged, the screen of the device is restored.
Storage and Maintenance
When the thermal imager will be not used for a long time, store in a dry, well-ventilated environment and charge the thermal imager at least four hours every two months during the storage
The infrared lens of the thermal imager is coated with an anti-reflection film. Clean the lens only when dirt or smudges are present. Frequent scrubbing may damage the lens coating.
To clean non-optical surfaces of the thermal imager, do not scrub with chemical solvents or cleaners. On exterior surfaces, wipe with a soft and dry microfiber cloth.
Warranty
The Burris Thermal Hand Held thermal products are covered by Limited Warranty and Burris will repair or
replace your product if it is defective. Do not disassemble the thermal imager as this will void the warranty. Contact your nearest Burris dealer for assistance.
For detailed warranty information scan the QR codes below.


This manual is available in German, French, Italian and Spanish translations HERE.


